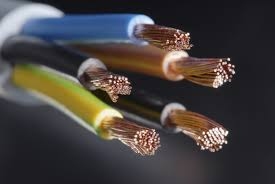
Check first to see that the circuit is on with an electrical tester and then turn the circuit off. Double-check that the circuit is now dead and then you may begin the installation. There are a couple ways of stripping the outer sheathing of Romex wire. One is to use a razor knife. Carefully start the cut about six inches from the end of the wire. Make the cut in the center of the wire, but do not cut too deeply. Because the bare ground wire is located in this area of the wire, it is the safest place to make the cut without nicking the insulated wires.
In order to make proper electrical connections to an outlet, you first must strip the appropriate amount of wire insulation from the wires. To do this, use wire strippers by selecting the proper sized wire size on the stripper gauge. If you are stripping NM 12-2 wire, then you will use the #12 wire setting. Place the stripper over the wire at about 3/4" from the end of the wire. That will usually give you enough wire to make the connection.
When the outlet is installed, go to your breaker panel and turn the circuit breaker on to the circuit you ever been working on. Take a tester and see if the circuit is working properly. You should read somewhere around 120 volts from the hot to neutral connection and also from the hot to ground connection. If so, you have successfully installed an outlet!